ARB Twin Compressor Engine Bracket
Tools Required
- Socket Driver with 17mm & 15mm Sockets
- Something or someone to support the hood.
ALL STEPS
- Pop the hood. Even better if you use our Moonraker Design Co. Hood Struts to do so!
- Support the hood, things can get a little squirrely when loosening the hood hinge. We use the same exact 2x4 used in the Hood Strut install video and it worked great.
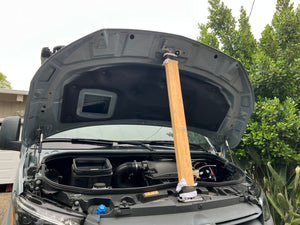
Support Your Hood
We used the same 2x4 that we used in our Hood strut installation video to suppor the hood during the ARB bracket install and it works great supporting the hood hinge. You can also use a friend if you have one of those and they are willing to sacrafice their arms for 10-15 minutes, but they probably won't be your friend afterwards... just saying...
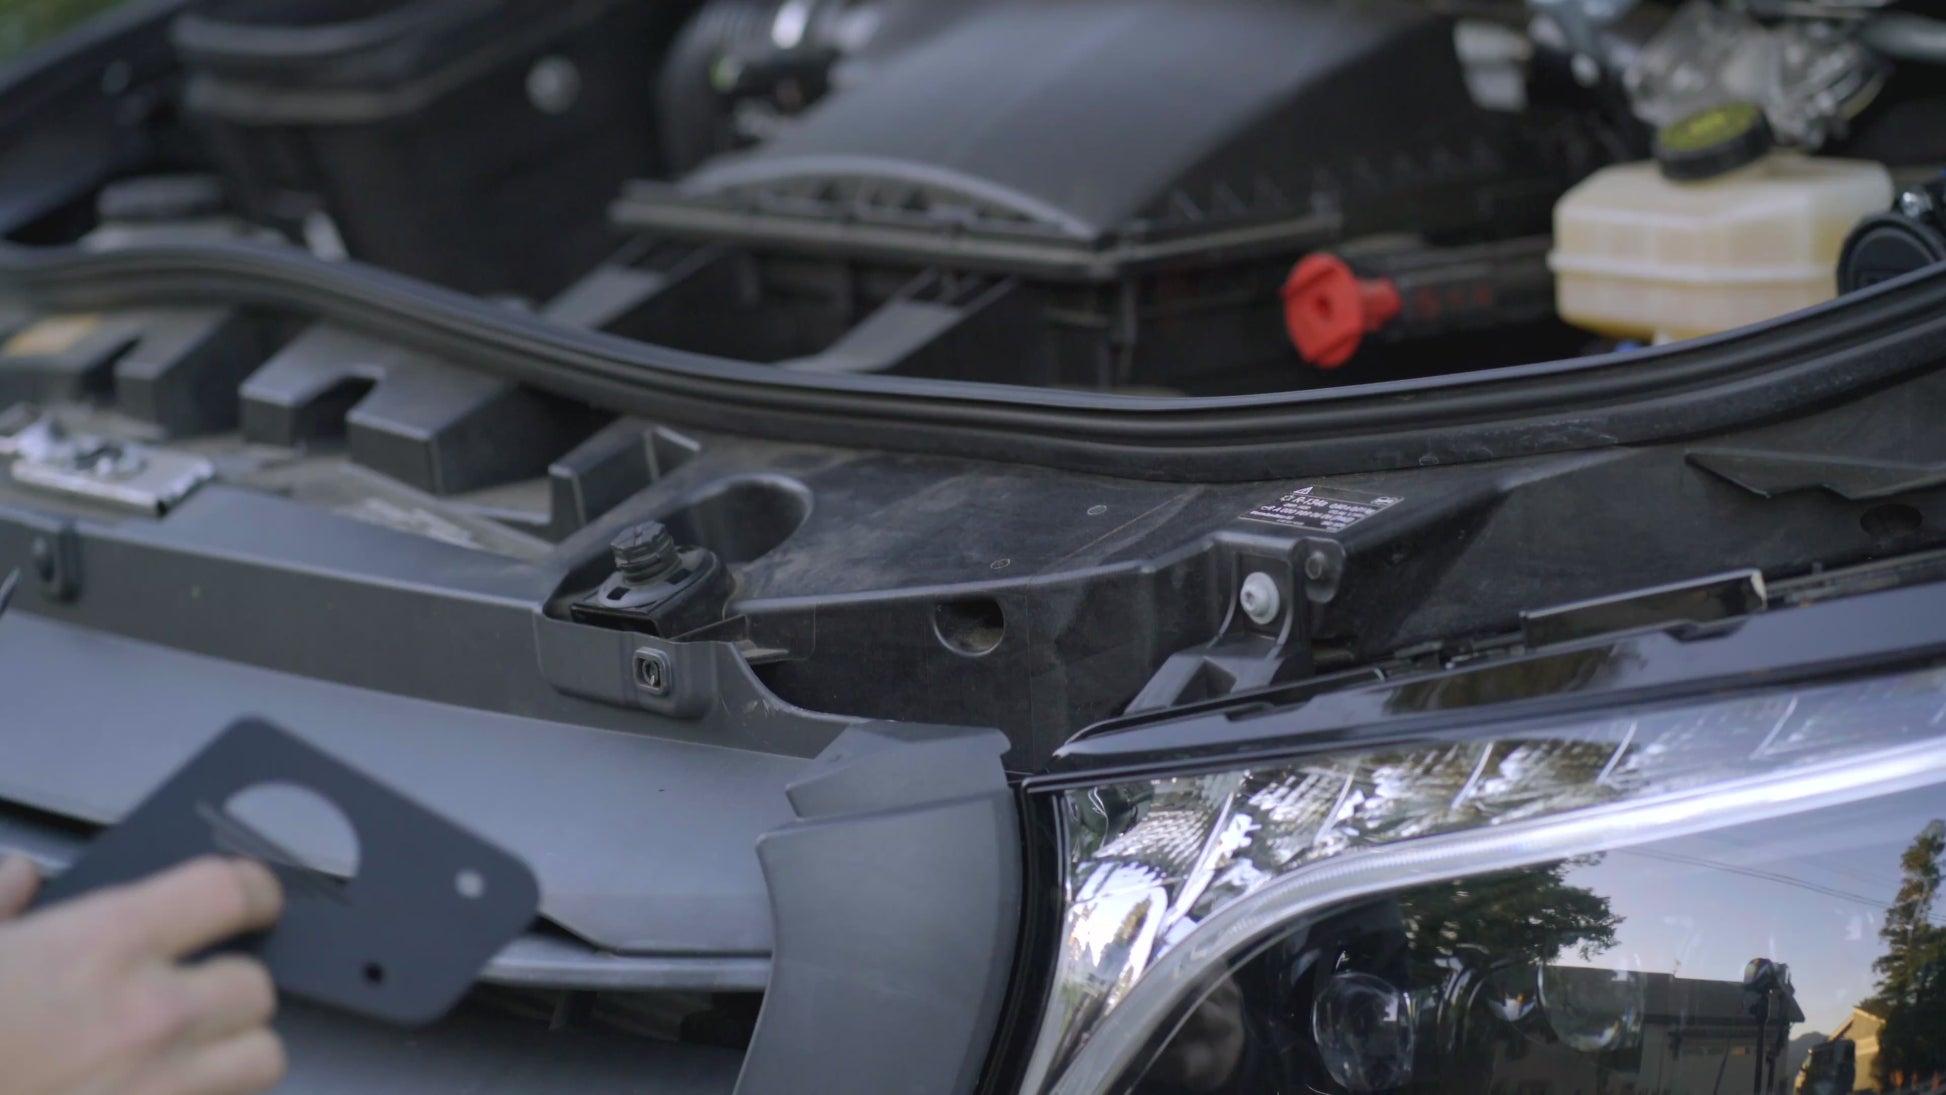
- Using a 17mm Socket, remove the driver's side front hinge bolt, then loosen the rear hinge bolt
- Remove the brass grounding nut from the grounding stud by the hinge (it helps with clearance when sliding the bracket in). Don't forget to put this back on.
- Using a 15mm socket remove the firewall bolt
- Slide the bracket into place, using the open slot to get under the back hinge bolt and reattach/retighten all the bolts.
- Make sure you line up the hinge with the old place it was before when tightening, you can see discoloration where it should go when tightening.
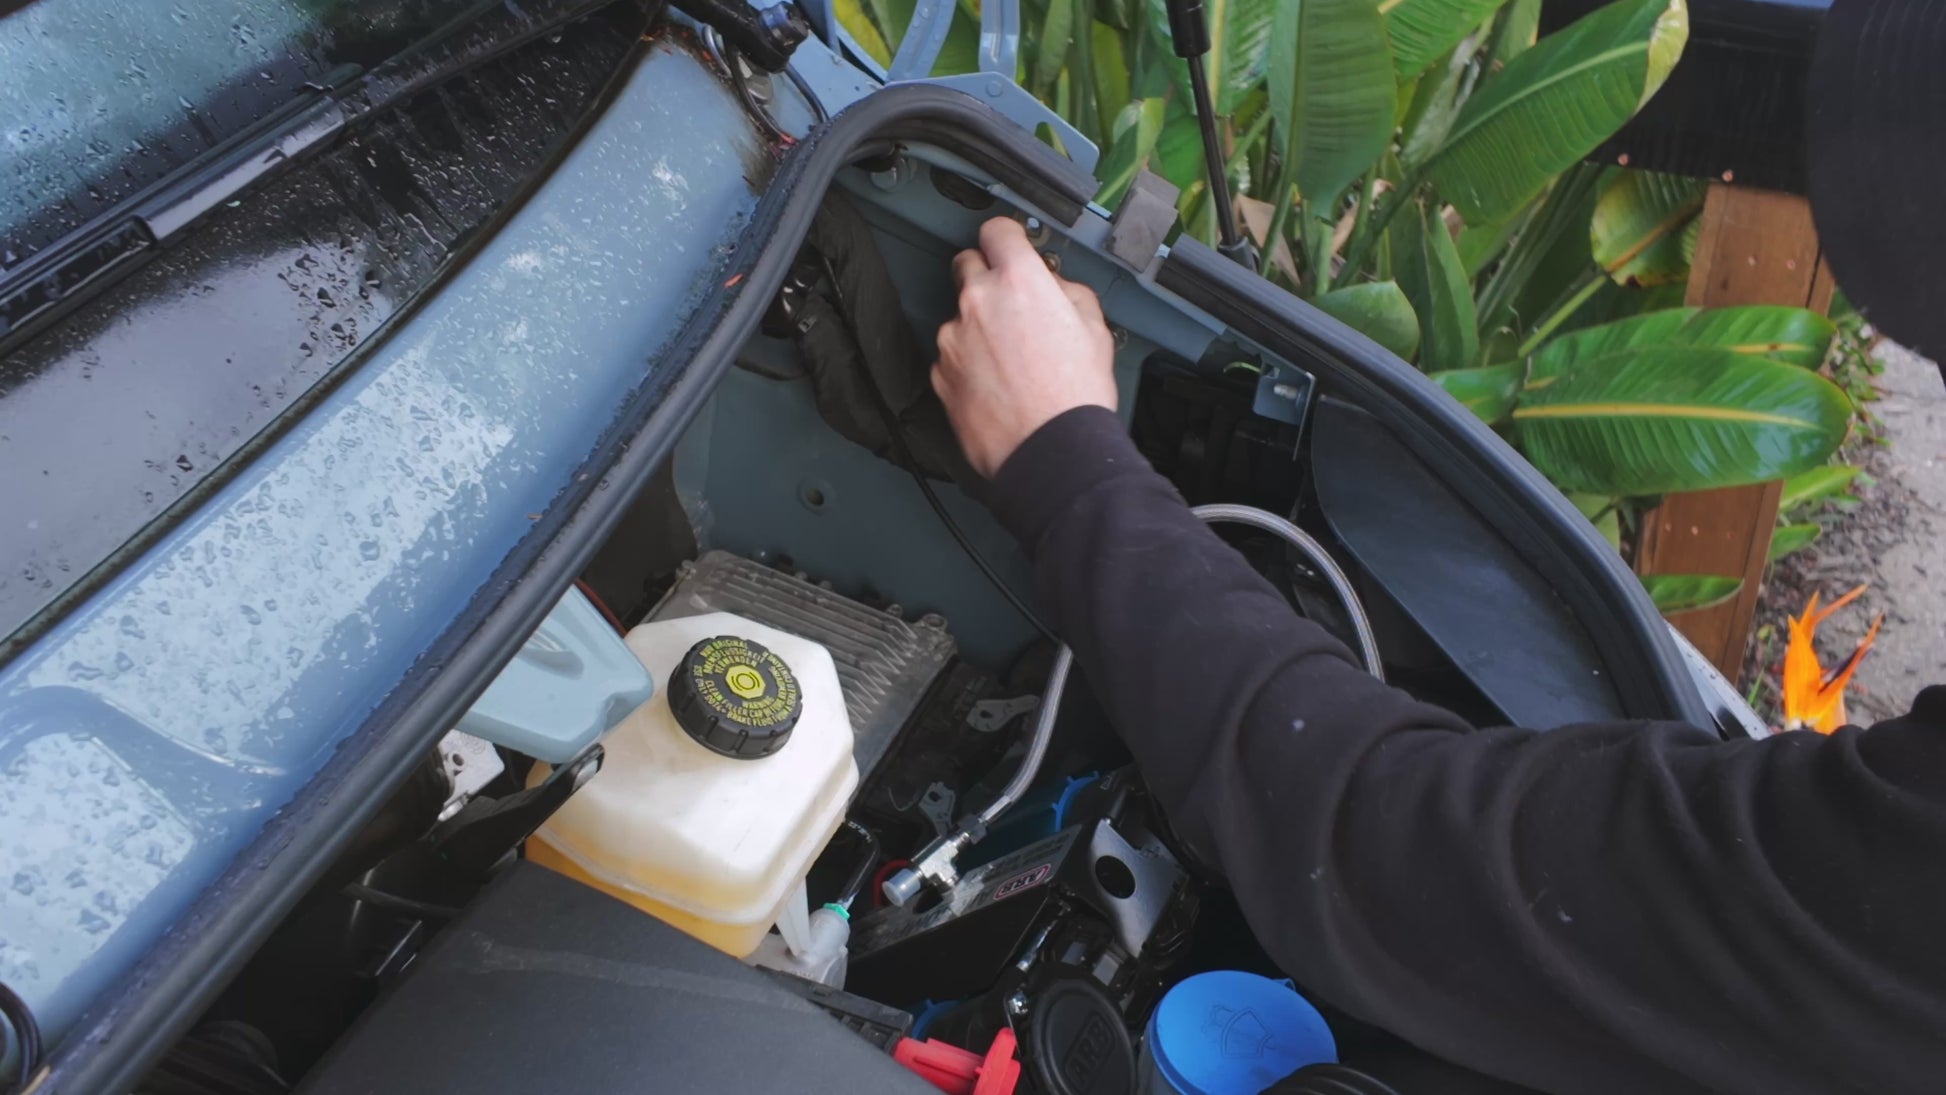
- Add the ARB compressor to the plate using the provided screws that come with the ARB twin compressor.

ARB Air Coupling Hidden Hood Bracket
Tools Required
FOR THE ARB AIR COUPLING BRACKET
- Sharpie or fine tip marker
- Centerpunch
- T25 Torx Driver
- Power drill with sharp 1/4" drill bit (for ARB Coupling Bracket Only)
- 4mm Hex Key
- Needle Nose Pliers
- 10mm Wrench
Additional Parts Required
All the ARB fittings are sold separately, you'll need the following parts:
- Hose Coupling US STD JIC-4 0740111
- Hose Coupling Dust Cap 0740113
- 0740109 ARB Air Line Adapter Fitting 45 ELBOW, 2 PK
And you will also need a JIC hose. If you are using our ARB Air Compressor Mounting Bracket, we recommend the:
Finally, you'll need a way to adapt the 1/4NPT port on the ARB unit itself to JIC. We this Tee Fitting from Titan Fittings, so we can send an airline to the back of the van too.
STEP 1
- Pop the hood. Even better if you use our Moonraker Design Co. Hood Struts to do so!
- With a T25 Torx screwdriver or bit, remove the grill screwn on the drivers side.

STEP 2
- Line up the bracket with the screw hole from which you just removed the screw from.
- It can help if you lighly reinstall this screw, but DO NOT TIGHTEN YET
- Line up the right side of the bracket edge with the mold line on the van plastic
- Mark the hole locations with a pen or pencil

STEP 3
- Drill the holes with a 1/4" Drill bit. It can help in the material, since it's a composite to use either a step bit or pilot drill a smaller hole size first. Drill on a low speed setting with lighter pressure.
- Make sure you drill perpendicular to the face, the screw head should sit flat on the bracket when inserted through the holes
- For the front hole you will need to drill through two layers into the open cylindrical area.

STEP 4
- Install the bracket inserting the back shorter screw in the plastic first. It can be a bit tricky to hold the washer and the nut, you can try putting a little bit of petroleum jelly on the two to stick them together. And then you can use some tape on a wrench to hold it while you tighten the button head with a 4mm hex key
- Loosely install the front Torx screw, DO NOT TIGHTEN YET
- Install the front longer included screw, for this one you need to use needle nose pliers to hold the nut in the cylindrical opening as you tighten the screw with a 4mm hex key. You can use the same petroleum jelly trick above to keep the nut and washer together. NOTE: I am working on finding a washer/nut combo in black stainless, but for now this is the best I've got. I'm open to other suggestions or tips as you install your parts!
- DO NOT OVERTIGHTEN THESE SCREWS
- Once the two button head screws are tight, you can snug up the T25 torx bit screw and you are DONE! If you have any questions don't hesitate to reach out!


