

Sprinter Van Front & Rear Ceiling Transition Bracket Kit
Shipping calculated at checkout
Out of stock
Sprinter Van Front & Rear Ceiling Transition Bracket Kit
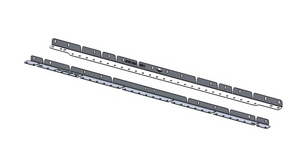
The Moonraker Design Co. Sprinter Van Front & Rear Ceiling Transition Brackets are part of our Sprinter 144 Van Ceiling Support Structural Kit and solve one of the trickiest parts of building a finished ceiling in a Sprinter van: creating clean, structural termination points at the front headliner roof rib and rear D-pillar.
Unlike the main roof ribs, these areas don’t provide a simple, flat surface for terminating ceiling panels, cabinetry framing, or aluminum extrusion. The factory geometry changes significantly at both ends of the van, leaving you to fabricate a solution or compromise how your ceiling is supported.
Our Front & Rear Ceiling Transition Supports are designed specifically around these factory surfaces, creating a strong, predictable structure to build from.
What They Do
- Create structural termination points at the front headliner roof rib and rear D-pillar
- Provide consistent modular machine hardware attachment points for your ceiling panels at these transitions.
- Help keep ceiling panels tight, flat, and properly supported at the ends of the ceiling
- Provide termination points for the 30x30mm MiSUMi aluminum extrusion when used with our Upper Cabinet Ceiling Bracket system
- Unique relief-cut geometry allows the bracket to conform to the factory rib curvature for a precise, flush fit.
- Eliminate the need to fabricate custom brackets around the complicated factory geometry at the front and rear of the van.
These are the same Front & Rear Transition Supports included with our complete Sprinter Van Ceiling Structural Kit, but are available separately for builders who only need to solve the front and rear ceiling transitions.
Includes: Front and Rear Ceiling Transition Supports & associated mounting hardware.
Not Included: Any additional hardware to mount your ceiling to these brackets is to be sourced separately. The hole pattern was designed for Sherex M5 Rivnuts with a 7.5mm body diameter.
Compatibility: 2014+ Mercedes-Benz Sprinter NCV3 & VS30 vans. Compatible with both 144WB and 170WB models.
Key Features
Installation Information

Testimonials
Absolutely stunning, from the shipping and delivery to the impeccable packaging and identification of the parts. I installed in about ten minutes with the video which was linked to my phone via the QR code included in the kit.. Can't say enough about the fit and finish of this kit. Very reasonable price too when you consider all of the extras.
David L.
Hood Strut Kit Review
The mounting system works great. I originally installed my MaxxAir fan with sheet metal screws but opted to replace it with with this and glad I did.
Michael O.
MaxxFan Interior Mounting Kit
Star Rating5 out of 5 starsDescriptionVery well built, the fact that the harness came with everything you need for a clean and easy look and install deserves more than five stars. Thank you!
Lulian T.
Sprinter Horn Upgrade Kit Reivew
Follow us @moonraker.design.studio
Feeling Social?
Follow us on Instagram for our latest news, content & more...